Essential QA Checklists Every Team Needs for Pre Release Testing Bug Tracking and UAT
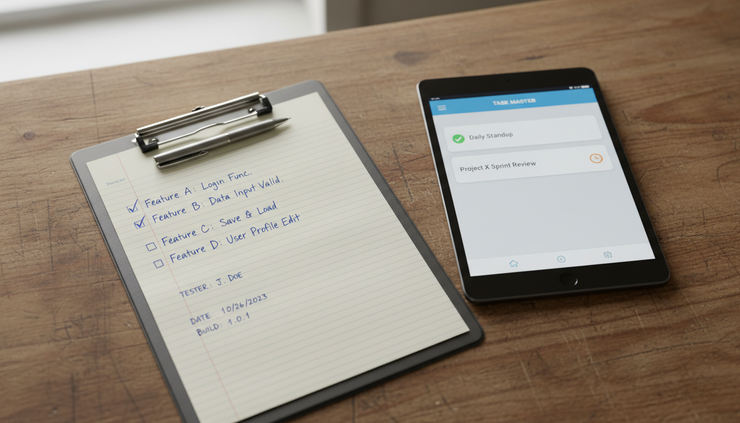
A release can fail for reasons that look small at first: one missed browser check, one unclear bug report, one acceptance test that no one confirmed with the customer. QA checklists reduce that risk by turning good habits into repeatable steps.
The best checklists do more than catch defects. They help teams work faster, communicate clearly, and make release decisions with less guesswork. They also protect teams from relying on memory during busy release cycles.
This guide covers practical QA checklists for three critical stages:
Pre-release testing
Bug tracking
User acceptance testing
Team-specific customization
Use these as starting points, then adjust them to match your product, process, risk level, and release pace.
Why QA checklists matter at every stage
QA work includes many moving parts. Testers verify features, developers fix defects, product owners review requirements, and release managers make go or no-go decisions. Without a shared checklist, each person may define “done” differently.
A strong checklist creates a common standard. It answers simple but critical questions:
What must be tested before release?
What information belongs in every bug report?
Who approves user acceptance testing?
What risks still exist?
What evidence supports the release decision?
Checklists also reduce repeat mistakes. If a production issue came from missed migration testing, the next checklist should include a migration validation step. If user acceptance testing failed because test accounts lacked the right permissions, the UAT checklist should require account setup before sessions begin.
A checklist should never replace judgment. It should support judgment by making routine checks visible and repeatable.
A good QA checklist does not slow down a team. It prevents avoidable rework that costs far more time later.
The most useful checklists are short enough to use and specific enough to matter. Long, generic lists often get ignored. A focused list tied to the current stage of work has a much better chance of becoming part of the team’s rhythm.
Build a pre-release testing checklist that catches release risks
Pre-release testing is the final quality gate before users see the product. This stage confirms that the release candidate works as expected, does not break critical workflows, and meets the team’s release criteria.
The goal is not to test everything from scratch. The goal is to verify the highest-risk areas and confirm that the product is ready for release.
What to include in a pre-release checklist
A practical pre-release checklist should cover the product, environment, data, performance, security, and release readiness.
Checklist area | What to verify | Why it matters |
Requirements coverage | Each committed feature has test coverage and pass or fail results | Prevents features from shipping without validation |
Regression testing | Critical existing workflows still work after recent changes | Catches defects caused by new code |
Cross-browser and device checks | Supported browsers, screen sizes, and devices behave as expected | Protects common user paths across real conditions |
Data validation | Test data, migrations, imports, exports, and calculations are correct | Reduces errors that can affect trust or reporting |
Error handling | Error messages are clear and the system recovers properly | Helps users complete tasks when something goes wrong |
Performance checks | Key pages and workflows respond within accepted limits | Prevents slow releases from hurting adoption |
Security basics | Access controls, permissions, and sensitive data handling are verified | Reduces exposure of private or restricted information |
Accessibility checks | Core flows support keyboard use, readable labels, and sufficient contrast | Helps more users complete important tasks |
Release notes | Known changes, fixes, and limitations are documented | Helps support, sales, and users understand the release |
Rollback plan | The team knows how to revert or pause the release if needed | Reduces damage if a serious issue appears |
This checklist should include clear pass or fail criteria. “Test login” is too vague. “Confirm users can sign in with valid credentials, receive a clear message for invalid credentials, and regain access through password reset” is much better.
Pre-release checklist example
Use this sample as a base:
Confirm all release candidate builds are deployed to the correct test environment.
Verify all planned user stories have acceptance criteria marked as tested.
Run smoke tests for login, account access, search, checkout, reporting, or other core flows.
Run regression tests for features touched by recent code changes.
Test supported browsers and devices based on real usage patterns.
Validate user roles and permissions.
Check integrations with payment systems, email services, APIs, or internal tools.
Confirm data migrations or schema changes completed successfully.
Review logs for repeated errors during testing.
Verify release notes, known issues, and support documentation.
Confirm monitoring is ready for launch.
Confirm rollback steps and release owner availability.
The final two items are easy to skip, but they matter. A team can ship a technically sound release and still struggle if no one watches the release after deployment or knows what to do if it fails.
How pre-release checklists improve efficiency
Pre-release checklists prevent late confusion. They make ownership clear and reduce last-minute questions like “Did anyone test this on mobile?” or “Do we know if the migration worked?”
They also help teams decide what not to test. If a change only affects billing, the checklist can focus effort on billing workflows, account permissions, invoices, notifications, and reporting. QA time goes where risk is highest.

Use a bug tracking checklist to make defects easier to fix
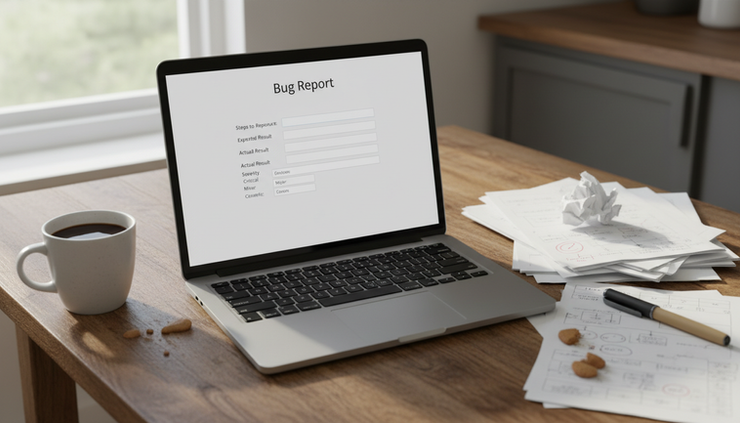
Bug tracking is often where QA quality becomes visible. A clear bug report saves time. A vague report creates back-and-forth, delays fixes, and can lead to duplicate issues.
A bug tracking checklist helps testers capture the right details the first time. It also helps developers reproduce issues faster and helps product teams judge severity.
What every bug report should include
A good bug report answers five questions:
What happened?
What should have happened?
Where did it happen?
How can someone reproduce it?
How serious is the impact?
Here is a checklist for consistent bug reporting.
Bug report field | What to include |
Clear title | A short summary of the problem and affected area |
Environment | Browser, device, operating system, app version, build, or test environment |
Preconditions | Account type, permissions, feature flags, test data, or setup steps |
Steps to reproduce | Numbered steps that another person can follow |
Actual result | What the system did |
Expected result | What the system should have done |
Evidence | Screenshots, screen recordings, logs, error messages, or sample files |
Severity | User or business impact |
Priority | Fix order based on release goals and risk |
Frequency | Always, sometimes, once, or unknown |
Related items | Linked requirements, test cases, duplicate bugs, or similar reports |
Owner and status | Current assignee and workflow state |
The difference between severity and priority is useful. Severity describes impact. Priority describes timing.
A typo on a legal consent page may be high priority because it blocks release approval, even if the technical severity is low. A rare layout issue on an unsupported browser may be low priority, even if it looks bad.
Bug tracking checklist example
Before submitting a bug, confirm:
The issue is reproducible or the report clearly says it is intermittent.
The title includes the affected feature and visible symptom.
The report includes the exact build or version tested.
The steps to reproduce start from a known state.
The expected result matches the requirement or accepted behavior.
The actual result describes the issue without guessing the root cause.
Screenshots or recordings show the issue clearly.
Logs or error messages are attached when available.
Severity reflects user impact.
Priority reflects release timing.
Possible duplicates have been checked.
The bug is assigned to the right project, component, or team.
Avoid bug titles like “Page broken” or “Error issue.” A better title would be “Checkout page shows payment error after valid card submission.” That title gives the affected area, symptom, and trigger in one line.
How bug tracking checklists improve quality
Bug tracking checklists reduce friction between QA and development. Developers spend less time asking for missing details. Testers spend less time rewriting reports. Product owners get clearer information when deciding whether a defect blocks release.
They also improve historical data. Clean bug records help teams spot patterns such as repeated defects in a certain component, unstable integrations, or unclear requirements.
Over time, that record becomes a guide for better testing and planning.
Create a user acceptance testing checklist that confirms real readiness
User acceptance testing, or UAT, answers a different question than QA testing. QA asks whether the product works as built. UAT asks whether the product works for the people and business process it is meant to support.
That difference matters. A feature can pass functional testing and still fail UAT if the workflow feels incomplete, uses confusing language, or does not match real user needs.
What to include in a UAT checklist
A strong UAT checklist covers preparation, test execution, feedback, and approval.
UAT stage | Checklist items |
Planning | Define scope, goals, participants, schedule, and decision criteria |
Test preparation | Prepare realistic scenarios, accounts, permissions, and sample data |
Participant guidance | Explain what to test, how to report feedback, and where to get help |
Execution | Track completed scenarios, blockers, defects, and comments |
Review | Sort feedback into defects, change requests, training needs, and accepted behavior |
Approval | Capture sign-off, open risks, and release conditions |
UAT should focus on real workflows, not isolated clicks. For example, instead of “test invoice screen,” the scenario should be “create an invoice for a new customer, apply a discount, send the invoice, and confirm the status updates correctly.”
UAT checklist example
Before UAT begins:
Confirm the scope of UAT is approved.
Choose participants who understand the real workflow.
Prepare scenario-based test scripts.
Create accounts with correct roles and permissions.
Load realistic test data.
Confirm the environment is stable.
Explain how to report issues and feedback.
Define what counts as a blocker.
Set a deadline for feedback.
Identify who can approve or reject UAT results.
During UAT:
Track each scenario as passed, failed, blocked, or not tested.
Capture comments in a consistent format.
Separate usability feedback from functional defects.
Confirm serious issues are triaged quickly.
Avoid changing scope unless the release owner approves it.
Keep a visible list of unresolved blockers.
After UAT:
Review all failed and blocked scenarios.
Confirm fixes for UAT-blocking defects.
Decide which non-blocking issues can move to a later release.
Record final approval from the right decision maker.
Share known limitations with support or training teams.
Store UAT evidence with the release record.
How UAT checklists improve release confidence
UAT checklists reduce confusion at the point where feedback can become messy. Different participants may report the same issue in different ways. Some may request new features. Others may flag training gaps as defects.
The checklist gives structure to that feedback. It helps the team decide what must be fixed now, what can wait, and what simply needs clearer guidance.
A good UAT checklist also protects the release decision. If someone asks why the team shipped, the record shows which scenarios passed, who approved them, and what risks were accepted.

Customize QA checklists so teams actually use them
Generic checklists are useful starting points, but teams need checklists that fit their product and workflow. A checklist for a banking app will look different from one for an internal scheduling tool. A weekly release process will need lighter checks than a quarterly release with major architecture changes.
Customization keeps QA practical.
Start with product risk
Build the checklist around what could hurt users or the business most.
For a healthcare scheduling product, appointment accuracy, privacy, reminders, and access control may be high-risk areas. For an e-commerce site, payment flow, pricing, inventory, taxes, shipping, and order confirmation may matter most. For an internal analytics tool, data accuracy and permission rules may carry the greatest risk.
Ask these questions:
Which workflows do users rely on most?
Which defects would block revenue, compliance, or daily work?
Which areas changed in this release?
Which features have caused past incidents?
Which integrations are most fragile?
Which user roles have the most sensitive access?
The answers should shape the checklist.
Match the checklist to release size
Not every release needs the same level of testing. Separate checklists by release type.
Release type | Checklist approach |
Small patch | Smoke tests, focused regression, bug fix verification, rollback check |
Minor feature release | Feature testing, regression around affected areas, documentation review |
Major release | Full regression, performance checks, security review, UAT, launch monitoring |
Emergency fix | Clear reproduction, narrow validation, risk review, post-release follow-up |
This prevents checklist fatigue. If teams must complete a huge checklist for every small fix, they may rush through it without care. A right-sized checklist earns trust.
Assign owners for each checklist item
Every checklist item needs a clear owner. Otherwise, people may assume someone else handled it.
Use names or roles, depending on team size. For example:
QA owns regression results.
Development owns unit test completion and code-level fix notes.
Product owns acceptance criteria and release scope.
Support owns user-facing help updates.
Release management owns deployment, monitoring, and rollback readiness.
Ownership helps avoid gaps, especially near release deadlines.
Review checklists after every release
After each release, spend a few minutes asking what the checklist missed.
Useful review questions include:
Which defects escaped to production?
Which checklist items were unclear?
Which steps were skipped and why?
Which items added no value?
Which new checks should be added?
Did the checklist help the release decision?
Make small changes often. A checklist that improves over time becomes part of the team’s quality system.
Keep checklist language specific
Vague checklist items are easy to mark complete without real testing. Replace broad language with observable checks.
Weak checklist item | Better checklist item |
Test permissions | Confirm admin, manager, and standard user roles can access only approved pages |
Check email | Confirm password reset, invite, receipt, and alert emails send with correct links |
Review mobile | Confirm checkout works on supported mobile screen sizes and input fields are usable |
Check errors | Confirm invalid inputs show plain-language messages and preserve entered data |
Specific wording reduces debate and helps new team members test with confidence.
Make QA checklists part of daily work
The best QA checklists are visible, current, and easy to complete. They should live where the team already works, such as a test management tool, project tracker, release ticket, or shared documentation space.
Avoid creating a checklist that only one person understands. Each item should be clear enough for another qualified team member to follow.
Here are a few habits that help checklists stick:
Keep each checklist focused on one stage of work.
Remove items that rarely apply.
Add links to test cases, requirements, or examples when helpful.
Use status labels such as `Passed`, `Failed`, `Blocked`, and `Not tested`.
Capture evidence for high-risk checks.
Review the checklist before the release meeting, not during it.
Treat skipped items as release risks, not silent exceptions.
The point is consistency. When pre-release testing, bug tracking, and UAT each follow a clear checklist, teams reduce avoidable mistakes and make better decisions under pressure.
Start with the checklists in this guide. Trim what does not fit. Add what your product demands. After the next release, review what worked and what missed the mark. That simple habit turns QA checklists from static documents into a practical quality system.


Comments